FUN TEA CUP MAKEOVER

LEVEL: EASY TO MEDIUM
This is an easy DIY (Do It Yourself) craft idea and makes a great gift for moms, dads and grandparents. Kids can also design their own tea set. See the steps below and WATCH THE DIY VIDEO.

Found at West Elm for under $5
STEP ONE
Find blank ceramic tea cups and/or saucers. White works well. My mom found ours at West Elm. And, we decided to use a saucer that already had a polka dotted design on it that I would embellish* (remember: *embellish means to add detail to something). You can also sometimes find perfect white tea cups at thrift stores.
STEP TWO
Sketch out some designs on paper before you start.

STEP THREE
Using ceramic markers, start drawing your design. We used Pebeo Porcelaine Markers (opaque). You can order them from Amazon, or at Pebeo.com.
Tip/Warning: We tried a lot of different pens. Sharpies definitely did not work even though a lot of bloggers suggest them. The ones that work best and are recommended by the art store are PEBEO pens or paints for porcelain. We decided not to recommend the Krylon pens that a lot of adult bloggers use because they had toxicity warnings. If you do use them, make sure to let the pain dry 24 hours before baking to let gases release. And, to be extra safe we suggest not placing any of the ink/paint near the edge of the cup where a kid’s mouth would touch it.
STEP FOUR
Let the paint dry for 24 hours if you are using anything with a toxic warning. This also allows the paint to release any toxins that would not be safe to put in the oven.
STEP FIVE
If you are under 14, ask a parent to place your tea cup in the oven for 30 minutes at 300 degrees. It’s a good idea to put your tea cups in the oven right after you turn it on so the cups heat up slowly.
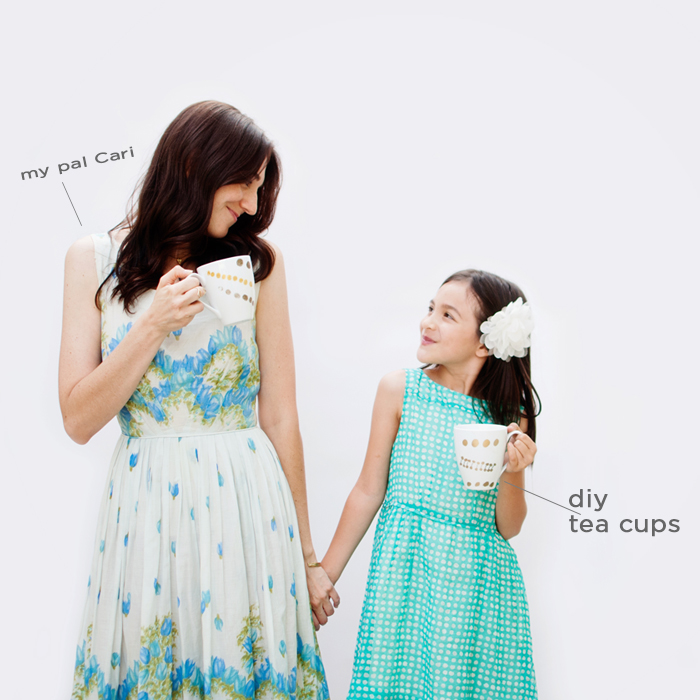
These make a great gift for friends, parents, aunts & uncles and grandparents!
STEP SIX
Enjoy your tea cups by sharing them with a friend.
Check out the perfect cookies to go with your tea cups: Dunkable Chocolate Covered Cookies That Look Like Tea Bags!
Don’t forget to check out our HOW-TO VIDEO for this project!
